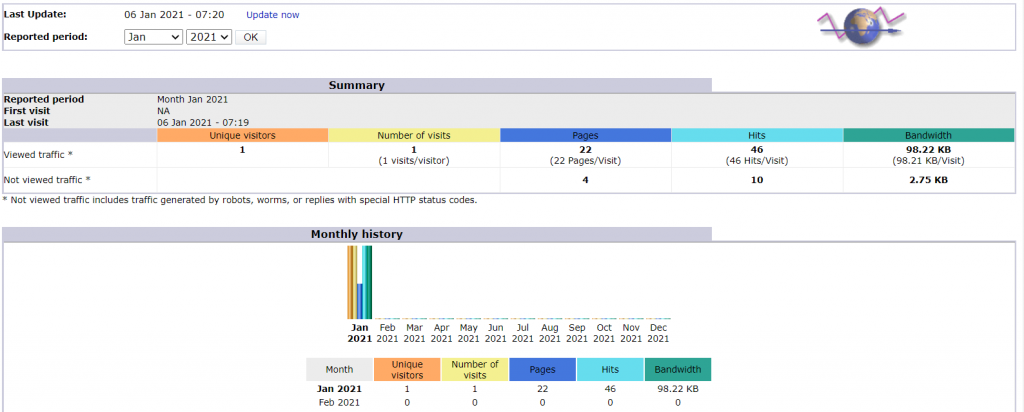
awstats in cyberpanel
cp /etc/awstats/awstats.conf /etc/awstats/awstats.example.com.conf
cp /etc/awstats/awstats.conf /etc/awstats/awstats.fastdl.cc.conf
LogFile="/home/fastdl.cc/logs/fastdl.cc.access_log"
SiteDomain="fastdl.cc"
HostAliases="www.fastdl.cc localhost 127.0.0.1"
AllowToUpdateStatsFromBrowser=1
/usr/lib/cgi-bin/awstats.pl -config=fastdl.cc -update
ln -sf /usr/lib/cgi-bin /var/www/html/cgi-bin
ln -sf /usr/share/awstats/icon/* /var/www/html/awstats-icon
ln -sf /usr/lib/cgi-bin /home/fastdl.cc/public_html/cgi-bin
ln -sf /usr/share/awstats/icon/* /home/fastdl.cc/public_html/awstats-icon
http://your-server-ip/cgi-bin/awstats.pl?config=example.com
http://fastdl.cc/cgi-bin/awstats.pl?config=fastdl.cc
chmod 777 -R /var/lib/awstats
crontab -e
*/30 * * * * root /usr/lib/cgi-bin/awstats.pl -config=fastdl.cc -update
Install AWStats
For Ubuntu/Debian:
apt install awstats -yFor CentOS8:
dnf install epel-release
dnf install awstatsSet up AWStats Config
You will need to create a configuration file for each website for which you wish to view statistics.
cp /etc/awstats/awstats.conf /etc/awstats/awstats.example.com.confAdd the following entries to /etc/awstats/awstats.example.com.conf
LogFile="/var/www/html/logs/access.log"
SiteDomain="example.com"
HostAliases="www.example.com localhost 127.0.0.1"
AllowToUpdateStatsFromBrowser=1Be sure to substitute the example.com domain name and the access log path with your own settings.
Verify Your AWStats Settings
Build your initial statistics, which are generated from the current logs
/usr/lib/cgi-bin/awstats.pl -config=example.com -updateThe example returns:
From data in log file "/var/www/html/logs/access.log"...
Phase 1 : First bypass old records, searching new record...
Direct access after last parsed record (after line 50)
Jumped lines in file: 50
Found 50 already parsed records.
Parsed lines in file: 146
Found 0 dropped records,
Found 0 comments,
Found 0 blank records,
Found 0 corrupted records,
Found 0 old records,
Found 146 new qualified records.Display AWStats
Add symlink for both cgi-bin and icons to your document root
ln -sf /usr/lib/cgi-bin /var/www/html/cgi-bin
ln -sf /usr/share/awstats/icon/* /var/www/html/awstats-iconNavigate to Web Admin at port 7080 > VirtualHosts > Name > Context, then create a CGI context with the following settings:
- URI=
/cgi-bin/ - Path=
/var/www/html/cgi-bin
Click the Save button and gracefully restart the web server. Now you can access your AwStats by visiting the URL, http://your-server-ip/cgi-bin/awstats.pl?config=example.com
Set up Cronjob to Update Logs(Optional)
Run the following command to setup cronjob:
crontab -eAdd the following rule:
*/30 * * * * root /usr/lib/cgi-bin/awstats.pl -config=example.com -update

Comments
Post a Comment